Stained Glass is the final piece of the semester. We will be designing a simple sun catcher for this assignment. We will start it next week.
Monday, December 2, 2013
Monday
We will be learning about fusing and slumping this week. We will have choice of square or circular dishes. We will be designing these dishes this week, and they will be fused and slumped throughout the month. As you work, you will continue to work on your casting and wire pieces.
Stained Glass is the final piece of the semester. We will be designing a simple sun catcher for this assignment. We will start it next week.
Stained Glass is the final piece of the semester. We will be designing a simple sun catcher for this assignment. We will start it next week.
Monday, October 28, 2013
Lost wax casting inspiration
Themes to be used for sketching
your ideas
Piece can be worn or displayed.
1.Nature

2. Mechanical

3. Outer Space
4.
Elemental

5. Geometric

6.Flowing Nonobjective

Thursday, October 24, 2013
Thursday
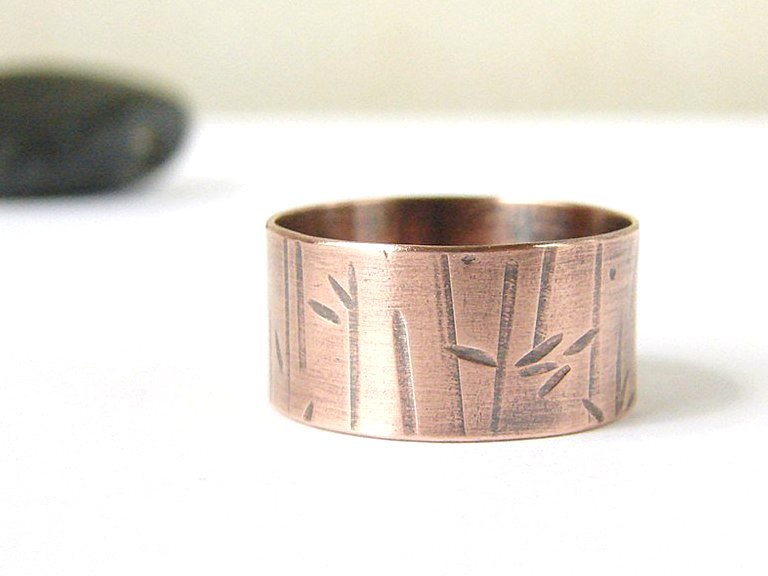
Rings are due today. Complete the evaluation, attach your sketches and place your ring in an envelope and staple everything together. Place everything in the turn in basket.
See me if you are unable to meet today's deadline.
We will be working on two jewelry designs in tandem. Some days you maybe waiting tools or materials for casting. These are the days you can work on the wire design. Sketches will be required for both assignments. I will be handing out assignment guidelines for both assignments.
The the topics are as follows:
-Wire jewelry design
-Lost wax casting
Monday, October 7, 2013
Monday
This is a video that shows how to shape your ring to get it ready to solder. Some of the techniques you will see are different, but keep in mind, we are not changing our established lab proceedures.
After the video keep working on whatever step you are on. If you want to reference this video later, it will still be on the blog.
After the video keep working on whatever step you are on. If you want to reference this video later, it will still be on the blog.
Thursday, October 3, 2013
Thursday
I am at East today demonstrating wheel throwing for Mrs. Hansen's classes. I will be back tomorrow.
Everyone has work to complete, some more than others. Be sure that you are on task. Mrs. Tonn would enjoy see what you're working on. Be sure that she does not have to ask you to show her your work, because you still have it in your locker!
The video will give you a start to finish look at how to make a band ring.
All surface work must be completed on your band ring before it is made round. This includes all textures, stamping and surface soldering.
Several people have bent their ring around the mandrel and are ready for the next steps...
1. The two end of your band should be overlapping to produce the correct size for the finished ring.
2. Using a bend pin, saw the band at the overlap portion of your band.
3. Use a flat file on the ends as needed so they meet snuggly. You cannot see light between the two ends if you did this step correctly.
4. Pickle the ring.
Monday, September 30, 2013
Thursday, September 26, 2013
Thursday
Today your sample medallions need to be completed and turned in. If it is not completed by the end of class, turn in what you completed so far. Next week you can work on finishing the missing techniques. Each technique is worth 10 points totaling 100 points. Place the medallion in an envelope with you name on it, and place it in the orange basket.
Also due today...final sketches for your ring must be turned in for grading, and so I can prepare the metal needed for the ring. If you are still working on the 10 sketch group, finish it quickly and show me so you can complete your final sketch today. All together the sketches are work 40 points, and are required to move on to the band ring. The band ring is a summative assignment, and will have a large impact on your grade.
Next week is the 6 week progress report. Make sure you are caught up. Assignments due before the 6 week mark cannot be made up after the progress report time. Plan accordingly.
Tuesday, September 24, 2013
Sample Fabrication:
1. Saw your metal in half with a zig zag line.
2. Draw a shape on one of the halves. Tap a dimple towards the inside of the line. Drill a whole in the dimple. Saw out the shape.
3. File the zig zag edges. Make one pointed and make the other curved. File the negative shape using flat files for the straight edges and round files for the curved edges.
4. Anneal your metal to prepare it for further work hardening.4. Anneal your metal to prepare it for further work hardening.
5. Apply a rolled texture to the half without the negative space shape.
6. Apply a stamped texture to the half with the negative space shape.
7. Pickling
8. Soldering
9. Add a bail
10. Sanding
Demo
Polishing
Medallions are due Thursday
Friday, September 20, 2013
Sample Fabrication:
1. Saw your metal in half with a zig zag line.
2. Draw a shape on one of the halves. Tap a dimple towards the inside of the line. Drill a whole in the dimple. Saw out the shape.
3. File the zig zag edges. Make one pointed and make the other curved. File the negative shape using flat files for the straight edges and round files for the curved edges.
4. Anneal your metal to prepare it for further work hardening.4. Anneal your metal to prepare it for further work hardening.
5. Apply a rolled texture to the half without the negative space shape.
6. Apply a stamped texture to the half with the negative space shape.
7. Pickling
8. Soldering
9. Add a bail
Demo
-finishing steps
Sketches for the final band ring should be worked on in between steps to finish the sample medallion.
Tuesday, September 17, 2013
Take Note!
You will loose your lab privileges for the remainder of the hour, and will have to make up time after school, if you do not follow the following rules:
-no more than 2 students by the pickle at any time.
-safety glass must be worn while sawing, soldering and working with the pickle.
-long hair must be tied back (not tucked back) around any machine with moving parts and around the flames.
Chairs must be put up at the end of the hour, and tools must be put away. If people are absent, your table has the responsibility instead. Thank you!
Monday, September 16, 2013
Monday
Take Note!
You will loose your lab privileges for the remainder of the hour, and will have to make up time after school, if you do not follow the following rules:
-no more than 2 students by the pickle at any time.
-safety glass must be worn while sawing, soldering and working with the pickle.
-long hair must be tied back (not tucked back) around any machine with moving parts and around the flames.
Sample Fabrication:
1. Saw your metal in half with a zig zag line.
2. Draw a shape on one of the halves. Tap a dimple towards the inside of the line. Drill a whole in the dimple. Saw out the shape.
3. File the zig zag edges. Make one pointed and make the other curved. File the negative shape using flat files for the straight edges and round files for the curved edges.
4. Anneal your metal to prepare it for further work hardening.4. Anneal your metal to prepare it for further work hardening.
5. Apply a rolled texture to the half without the negative space shape.
6. Apply a stamped texture to the half with the negative space shape.
7. Pickling
8. Soldering
Demo
-Adding a bail.
-finishing steps
Friday, September 13, 2013
Friday
Sample Fabrication:
1. Saw your metal in half with a zig zag line.
2. Draw a shape on one of the halves. Tap a dimple towards the inside of the line. Drill a whole in the dimple. Saw out the shape.
3. File the zig zag edges. Make one pointed and make the other curved. File the negative shape using flat files for the straight edges and round files for the curved edges.
4. Anneal your metal to prepare it for further work hardening.4. Anneal your metal to prepare it for further work hardening.
5. Apply a rolled texture to the half without the negative space shape.
6. Apply a stamped texture to the half with the negative space shape.
7. Pickling
8. Soldering
Tuesday, September 10, 2013
Tuesday
Keep working on your packet. At this time, do not work on the ring designs. Once our sample is done, we will talk about how to approach this page.
Sample Fabrication:
1. Saw your metal in half with a zig zag line.
2. Draw a shape on one of the halves. Tap a dimple towards the inside of the line. Drill a whole in the dimple. Saw out the shape.
3. File the zig zag edges. Make one pointed and make the other curved. File the negative shape using flat files for the straight edges and round files for the curved edges.
4. Anneal your metal to prepare it for further work hardening.4. Anneal your metal to prepare it for further work hardening.
Demo
5. Apply a rolled texture to the half without the negative space shape.
6. Apply a stamped texture to the half with the negative space shape.
Monday, September 9, 2013
Keep working on your packet. At this time, do not work on the ring designs. Once our sample is done, we will talk about how to approach this page.
Sample Fabrication:
1. Saw your metal in half with a zig zag line.
2. Draw a shape on one of the halves. Tap a dimple towards the inside of the line. Drill a whole in the dimple. Saw out the shape.
Demo
3. File the zig zag edges. Make one pointed and make the other curved. File the negative shape using flat files for the straight edges and round files for the curved edges.
4. Anneal your metal to prepare it for further work hardening.
Friday, September 6, 2013
Friday!!!!
Keep working on your packet. At this time, do not work on the ring designs. Once our sample is done, we will talk about how to approach this page.
$2 LAB FEES!!!!!!
Sample Fabrication:
1. Saw your metal in half with a zig zag line.
Demo
2. Draw a shape on one of the halves. Tap a dimple towards the inside of the line. Drill a whole in the dimple. Saw out the shape.
Wednesday, September 4, 2013
Lets get started!
Guided reading assignment: "Rings without Stone"...we will be working on this throughout this week and next week.
Sample Medallion Day 1 Demo:
-sawing a zig zag line
Monday, September 2, 2013
Welcome to Jewelry and Glassworks
Welcome to Jewelry and Glassworks at LHS
-Intro
-Syllabus
-Pre-test
-Lockers
-Please put your chairs up at the end of the hour.
Pre-Test:
1. On a piece of paper write your name, date and class hour.
2. Define the following terms:
-solder
-butt joint
-flux
-torch
-bench pin
-annealing
-work hardened
-jewelry pickle
-stamping
-piercing
-buffing
3. Hand into the orange basket by the teachers station
Subscribe to:
Posts (Atom)